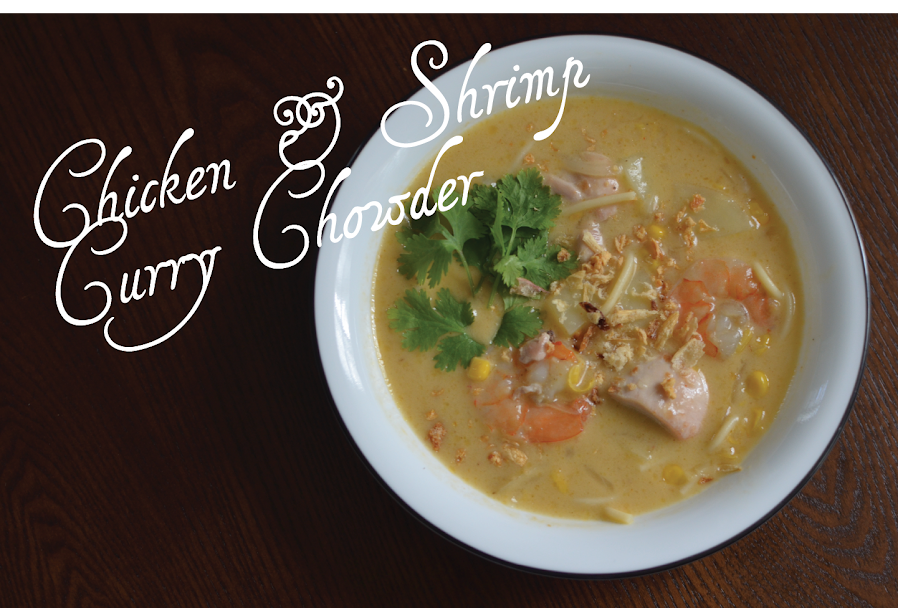
I follow the Eatsy blog over at Etsy and saw Kimberley's post on Summer Shrimp and Corn Chowder. Perfect! I was looking for recipes involving coconut milk since I had apparently decided to hoard Chaokoh coconut milk after seeing it on sale at the local 99 Ranch Market. 88 cents for a can? Gimme a case. I think I've managed to make dessert with coconut milk, fruit and sago, curries, pot de cremes, and the list goes on. Unfortunately, I didn't have all the recipe's ingredients on hand. I was feeling a bit lazy to go grocery shopping so I decided to improvise on whatever was currently in my pantry and refrigerator.
Chicken & Shrimp Coconut Curry Chowder
(Time: 60min, 6 servings)
- 1lb raw/defrosted shrimp
2lb chicken thighs
1/2 an onion
3/4lb gold yukon potatoes (or red potatoes)
32oz chicken broth
1 (15oz) can of full fat coconut milk
1 (15oz) can of corn (cream of corn is ok too!)
2 tbsp Panang Curry paste
2 tbsp Fish Sauce
1/2 lb of dried spaghetti (1/4 of a 32oz box)
Fried garlic & onions for garnish
Cilantro for garnish
1. Shell the shrimp and dice the chicken thighs in one inch cubes and put them aside.
2. Use a separate cutting board and halve the half onion before thinly slicing them. Wash the potatoes and dice them in half inch cubes.
3. Boil water in a pot for the spaghetti. Break the spaghetti into thirds before throwing them in the pot. Follow the instructions on the package and cook the spaghetti until al dente. Strain and set aside.
4. Lightly drizzle some olive oil into a different pot and turn the stove on high. Once the oil is hot, brown the cubes of chicken. There is no need to fully cook the chicken since we will be simmering it in chowder. Plate the chicken and put them aside.
5. Using the same pot, drizzle some olive oil and saute the onions until they soften. Add the panang curry paste and stir until fragrant.
6. Pour the coconut milk and chicken stock in the pot containing the onion and curry mixture. Cover the pot and bring to a boil, then reduce to a simmer.
7. Add the chicken and potatoes before covering the pot again. Simmer for 20 minutes or until the potatoes are cooked through but still firm.
8. Add the shrimp and corn and keep the pot at a simmer for 5 minutes or until the shrimp is pink.
9. Place spaghetti at the bottom of a bowl and top with the chowder. Garnish with cilantro and fried onions and garlic before serving.
I'm always a bit peeved about recipes when they require too many bowls or utensils and such. It seems kind of trivial, but with a gazillion other things piled on the dishrack, sometimes adding another dish just makes the entire thing look like the leaning tower of Pisa. Normally there's at least two mixing bowls involved when baking cupcakes: one for wet ingredients and another one for dry ingredients. Among the numerous measuring spoons and spatulas that I end up wielding, that is.
I opted for Robyn's chocolate cupcake recipe over at Add a Pinch since it involved a grand total of one mixing bowl. Like all cupcake recipes, it's quite simple. However I thought it was very interesting that it involves a half cup of boiling water. I raised an eyebrow when I saw the ingredients list, but I was boiling a kettle of water for tea already, so what the heck let's do it. And yes, just drop in the wet ingredients one by one into the bowl of dry ingredients. As Robyn mentions, it's a very runny mixture - but when baked it gloriously rises and has a wonderful moist and soft texture.
Speculoos cookie butter is my most recent find. I fancy ginger snap cookies, and was head over heels after discovering Speculoos at the local Trader Joe's. I look at it as a substitute for nutella or peanut butter, delicious on bread or crackers or in crepes. Speculoos icing is the next best thing I tell you.
Speculoos & Cream Cheese Icing
(http://www.speculoos.us/dessert2.html)
- 1/2 cup Speculoos
8oz pacakge of cream cheese
1/2 cup powdered sugar
1/2 tsp vanilla extract
1. Add all the ingredients in a mixing bowl and use a hand mixer to whip the icing. Put in a piping bag or slather on with a knife. Enough for 12 cupcakes.
Frozen shrimp is a staple in my freezer when I'm not sure what to make for dinner. They can be quickly boiled for Vietnamese spring rolls (goi cuon), tossed with salad with nuoc mam (fish sauce) dressing, and of the course the favorite "backup dinner" of chili coconut shrimp. Unlike the American style coconut shrimp, which is deep fried in a batter of coconut flakes, this recipe uses coconut oil which adds the perfect depth of flavor. However to crisp the exterior of the shrimp, it is extremely important to use a large frying pan to avoid making the dish mushy/gloopy from the flour. It's a fairy quick, pleasantly spicy shrimp dish to accompany jasmine rice for dinner and vegetables.
Chili Coconut Shrimp
(Time: 30min, Serves: 3~4 people)
- 2lb extra jumbo frozen & unpeeled shrimp
3 cloves garlic
3 Thai/bird's eye chilis (can be omitted!)
1 stalk of green onion/scallion
1/4 cup chopped cilantro
1 1/2 tbsp coconut oil
1 tsp salt
Flour for dredging
1. Mince the garlic, chilis, and roughly chopped cilantro and put aside. Thinly slice the scallions at an angle and put those aside as well. In a separate container, peel the shrimp and toss with 1 tsp of salt.
2. Take approximately a quarter to half cup of flour onto a plate. Lightly dredge each shrimp in flour and pile them onto the same plate
3. Heat the coconut oil on the frying pan. Make sure the pan is large enough to allow the shrimp to spread across the pan in one layer. Once the pan is hot, add the garlic and chilis to the pan and fry for 3 minutes, just beginning to brown, on medium heat. Do not let the garlic brown and burn. Stir the garlic and chili so that it covers the pan uniformly
4. Place the shrimp in a single layer on the pan. Without stirring the pan, cook the shrimp for 4 minutes on medium heat to allow the garlic and chili stick to the shrimp. Using tongs or chopsticks, flip over each shrimp and cook for another 3 minutes. The shrimp should be nice and pink, with a crisp coat of garlic and chili.
5. Plate the shrimp and toss with the cilantro and green onions.
I confess that I don't bake very often, although I've decided to do so more often this year. I love carrot cake and had a bag of carrots lying around leftover from a veggie dish. I followed the recipe from Chocolate & Zucchini, substituting the pecans with walnuts and baking them for 30min in a muffin pan. The recipe was very simple enough for me to make this twice in a span of two weeks. They were not too sweet, moist, and delicious with a bit of bite. Perfect for a quick afternoon snack with a cup of coffee.
I received this as a gift from my sister this past Christmas and found it to be by far the best makeup remover solution I have used. At first glance it just looks like a pretty bottle of water. One of the best features of the Bioderma micelle solution is that it is odorless, very gentle on the skin, and manages to remove waterproof makeup in a breeze. With other makeup removers I frequently find myself washing my face afterwards with a facial cleanser to get rid of the bit of sticky residue that seems to get left behind; and then followed by moisturizer to tend to the dryness. With the Bioderma micelle solution, I only needed to gently wipe my face with a cotton pad. And that's it. My skin felt soft and surprisingly moisturized, that I went to bed just like that.
Due to slight changes in my work schedule, I now find myself in the position of having to prepare a dinner-box rather than the usual lunchbox. Naturally I try to find something easy to cook that is rich in protein and vegetables. The Japanese version of beef carpaccio, aka gyu no tataki, is my easy go-to protein recipe. Tender slices of beef, seared on the outside, doused with ponzu sauce requires very minimal work. Ponzu, described as somewhat of a citrus based soy sauce, isn't quite soy sauce. But because of its lower salt content (compared to soy sauce) and tangy flavor, I frequently use it it as a salad dressing.
I usually keep a few grassfed beef steaks in the freezer that vary from dry aged t-bone to sliced chunks of london broil. For the ever-so-easy Gyu no Tataki recipe, I tend to go for a leaner cut of beef since it isn't very pleasant to bite into a chunk of cold beef fat. Or better yet, pull out that leftover steak you ate over the weekend and use it for this recipe!
Japanese Beef Carpaccio (Gyu no Tataki)
(Time: 2hr, Serves: 2~3 people)
- 12~16oz steak (lean)
- 1 green onion
- 1 piece of ginger (1.5in x 1in, or smaller/larger if you please)
- Ajipon or any Ponzu sauce
- Salt
1. Trim off any excess fat from the steak, and salt both sides. Place on hot grill or frying pan, cooking each side for 4 minutes on medium high heat. Adjust the cooking time depending on how rare you like your steak. Although it is beef carpaccio after all!
2. Let the steak cool down to room temperature before putting it in the freezer for 1.5hrs, or until fairly firm/solid. Be careful not to over-freeze the steak, as you will have to saw through it with your knife!
3. In the mean time, thinly slice the green onion and grate the ginger.
4. Take the steak out of the freezer and slice thinly. Garnish with the green onion and grated ginger, and liberally drown the sliced steak with Ponzu. Serve with a bowl of brown rice.
I had not seen my sister since last December, so I decided to spend Thanksgiving with her in Philadelphia. Although I've visited Philly on previous occasions, being here during the winter was a first. The city's historic brick buildings, re-established as cafes, restaurants, bars, and shops, provided the quintessential backdrop for the holidays. Philadelphia's old city charm is indeed a stark contrast to the Bay Area's lifeless and dull "winter." My apologies, what winter? While squinting at the cars at the arrival area of the Philly airport, I finally spotted my sister waving somewhat frantically to catch my attention. I tossed my luggage in the trunk of the car and off we went to Geno's & Pat's for cheesesteaks.
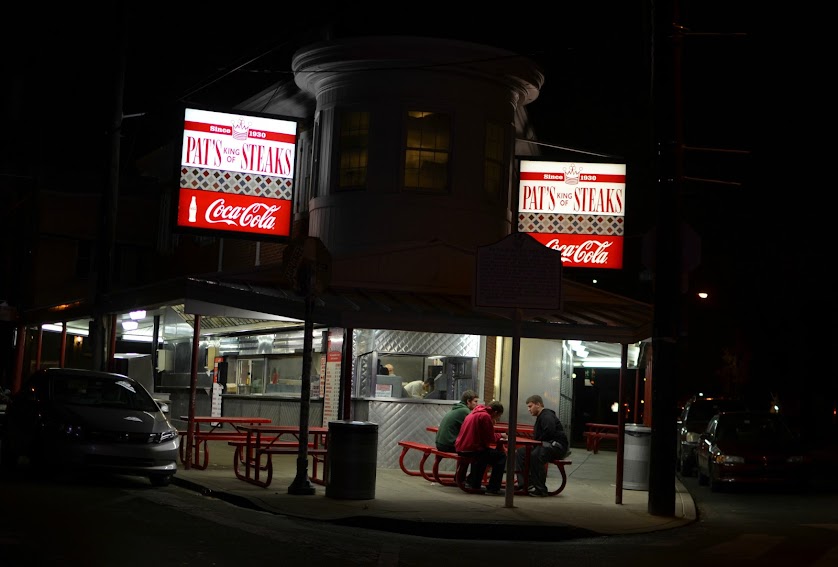
1. Geno's Steaks VS Pat's King of Steaks
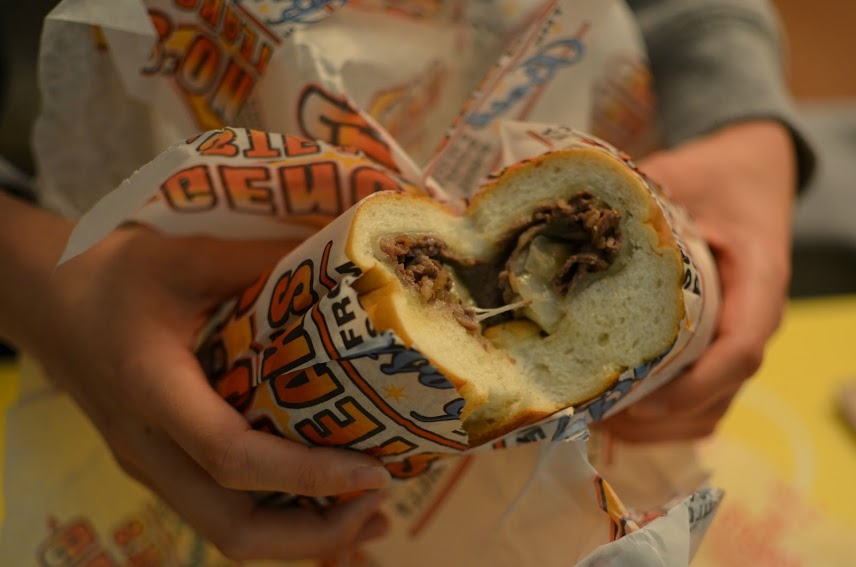
At first glance Geno's exuberant neon signs seem awfully more festive compared to Pat's. Nonetheless, we decided to remain objective until we had tried their cheesesteaks. We had parked adjacent to Pat's so we ordered there first in appropriate cheesesteak ordering-lingo: onions, whiz with. My sister, grasping the Pat's cheesteak, looked me in the eyes long enough to whisper "PUT THIS IN YOUR PURSE. I don't want them to see it!" I obliged and put the cheesteak in my handbag before we walked across the road to Geno's to order another with onions and provolone. My sister tucked it under her coat and we shuffled back to the car to head to her apartment for a taste test.
Pat's cheesesteak seemed more moist, perhaps due to the copious slathering of cheese whiz. Geno's was a bit dry, and the bread a bit more crunchy. We were surprised that they were both not very salty, making them easy to devour without reaching for some water. However I was hoping for a bit more meaty flavor from either of the cheesesteaks. My sister and I polished off both of them rather quickly. It's difficult to determine which is the better of the two - I think we may need to try a few more combinations before we can reach a conclusion :)